


How Handmade Textured Wall Art Is Made

The Handmade Process Explained

Handmade textured wall art is created through a sequence of material and artistic steps: concept planning, surface preparation, texture application, drying or curing, pigment finishing, sealing, and final inspection. This overview explains how textured wall art is made from concept planning through final inspection, while preserving the handmade character of each piece.
Unlike printed canvas artwork, genuine textured pieces rely on physical surface variation. The final appearance comes from the interaction between material, hand-applied texture, pigment, and light.
The exact process differs between artists and materials. Mineral plaster, lime-based finishes, and acrylic modeling compounds each behave differently, so production time and surface characteristics vary depending on the medium, artwork size, and relief depth.
Step 1: Designing the Composition
Before materials are applied, the artist plans the overall direction of the piece. This early stage is an essential part of the art making process because proportion, palette, and texture movement are decided before the surface is built.
This stage usually considers:
· artwork size and proportion
· wall placement
· color palette
· texture movement
· balance between raised and open areas
For wabi-sabi-inspired artwork, the goal is usually not perfect repetition. The artist often works with organic variation, allowing the material itself to influence the final surface.
Step 2: Preparing the Canvas and Foundation
A stable foundation is essential for textured artwork.
The preparation process may include:
Canvas Preparation
The canvas is stretched onto a wooden support and prepared so later layers can properly adhere.
Base Layer Application
The artist applies a foundation layer using materials such as: The selected base influences the plaster painting technique used later, especially when working with mineral plaster or lime-based compounds.
· mineral plaster
· lime-based compounds
· acrylic modeling paste
The choice of material affects:
· texture flexibility
· drying behavior
· final surface appearance
A thicker relief generally requires more careful handling because heavier material creates additional stress on the support structure.
Step 3: Creating the Texture by Hand
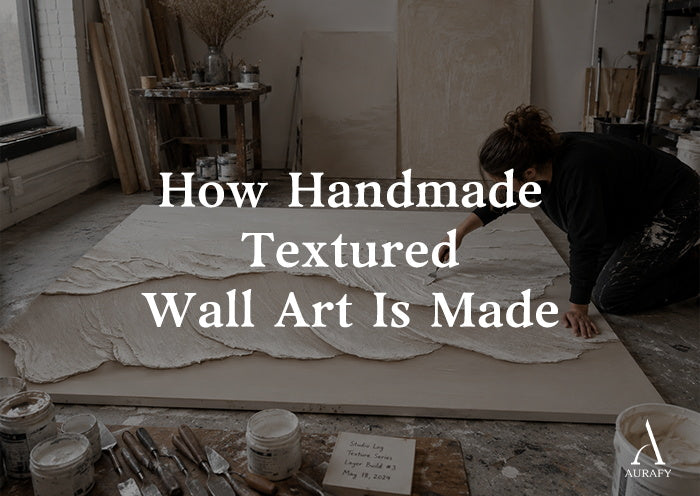
The defining stage of textured artwork is the physical creation of the surface. This is the core of the handmade plaster art process, where texture is shaped manually rather than reproduced as a printed effect.
Artists may use tools such as:
· palette knives
· trowels
· brushes
· other shaping tools
The material is pushed, dragged, layered, or carved to create:
· ridges
· waves
· cracks
· organic transitions
· abstract movement
Because the surface is formed manually, small variations naturally occur between pieces. These variations are part of what distinguishes handmade canvas art from standardized printed artwork.
This is one of the main differences between handmade relief artwork and digitally printed designs that reproduce the same image repeatedly.
Step 4: Drying, Curing, and Surface Development

After the texture is created, the artwork needs time to dry and stabilize. In a textured painting process step by step workflow, this curing stage is essential before pigment, sealing, and final finishing can begin.
The required time depends on:
· material type
· thickness of the applied layer
· humidity
· airflow
· artwork size
Some textured pieces may dry within several days, while thicker mineral-based relief work may require longer curing periods.
During this stage, natural surface changes may appear. Fine surface variations can be part of the material character, while larger structural problems usually indicate issues with application, support, or drying conditions.
Step 5: Pigment, Sealing, and Final Finish

Once the textured surface is sufficiently dry, artists may add color layers or protective finishes.
Finishing steps can include:
Pigment Application
Color may be applied through:
· mineral pigments
· acrylic color washes
· layered surface treatments
The final appearance depends on how pigment interacts with the texture underneath.
Protective Sealing
Some artworks receive a protective coating to help reduce surface vulnerability.
The suitability of a sealant depends on:
· the artwork material
· desired surface appearance
· environmental conditions
A matte finish is often preferred for textured artwork because it preserves the visual relationship between texture and light.
Step 6: Quality Review Before Delivery
Before shipping, the artwork should be checked for:
· surface consistency
· frame stability
· color appearance
· visible damage
· packaging requirements
Many studios also provide final photos or videos before shipping, although this practice differs between sellers. This kind of transparency gives buyers a clearer view into the artist studio workflow and the physical production behind the finished artwork.
Buyers should confirm the studio’s preview and approval process before ordering a custom piece.
Handmade Textured Art Production Timeline
|
Production Stage |
Main Purpose |
Typical Time Range |
|
Design planning |
Confirm composition, size, and colors |
Varies by project |
|
Surface preparation |
Build stable artwork foundation |
Often about a day, depending on process |
|
Texture creation |
Apply and shape relief layers |
Varies by complexity |
|
Drying and curing |
Allow materials to stabilize |
Several days to multiple weeks depending on material |
|
Pigment and sealing |
Complete surface appearance |
Varies by finish |
|
Final inspection |
Prepare artwork for delivery |
Varies by studio |
These are general examples, not fixed production schedules. Larger artworks and deeper textures usually require additional time.
What Makes Handmade Texture Different From Printed Art?
The main difference is not simply that one surface is raised and the other is flat.
Handmade textured artwork contains physical decisions made during production:
· where material is added
· how tools move across the surface
· how layers overlap
· how pigment settles into texture
A printed artwork reproduces a visual image. A handmade relief piece contains a physical surface created through a process.
Frequently Asked Questions
Does textured plaster wall art naturally crack?
Some mineral-based materials can develop fine surface changes during drying and aging. Small surface variations may be part of the material character, while significant cracking or loose sections should be assessed rather than assumed to be normal.
How long does handmade textured wall art take to make?
The timeline depends on the artwork size, material, texture depth, and finishing process. Some pieces may take around a week, while larger or more complex works can require several weeks.
Do handmade textured paintings look exactly like the preview image?
Not always. Photos and screens cannot perfectly reproduce physical texture, lighting, or mineral color variation. Handmade materials naturally create slight differences between the digital preview and the finished piece.
How can I verify that textured art is actually handmade?
Look for process transparency. Useful evidence includes: If you are asking how is wabi sabi wall art made, these production details help distinguish genuinely handmade work from printed imitations.
· photos or videos during production
· material descriptions
· explanation of the texture process
· clear information about the artist’s workflow
Commission a Handmade Textured Artwork

Choose the size, palette, and texture direction that fits your space.
Start a custom artwork consultation and create a piece designed around your wall, lighting, and interior style.
Share:
Can Wabi-Sabi Art Make a Room Feel Calm?
How Large Textured Art Is Shipped Safely